How to Install a Double Din MP5-II Player in Your Car

A car MP5 can transform your driving experience. The Double Din MP5-II Player offers a sleek design and advanced features. Imagine cruising with Bluetooth connectivity and touchscreen controls at your fingertips. Upgrading your car's audio system enhances sound quality and adds modern functionality. A new player brings life to your daily commute or road trip adventures. Dive into the Double Din Car HD MP5-II Player Manual for guidance. This manual ensures you unlock every feature. Get ready to enjoy a superior in-car entertainment experience.
Gather Necessary Tools and Supplies
Before diving into the installation, you need to gather a few essential tools and supplies. Having everything ready will make the process smoother and more enjoyable.
Tools Required
Screwdrivers
Screwdrivers are crucial for removing screws from the dashboard and stereo unit. You might need both Phillips and flathead types. Check your car's manual to see which ones you'll need.
Wire Strippers
Wire strippers help you strip the insulation off wires without damaging them. This tool ensures clean and precise connections when working with the wiring harness.
Socket Wrench Set
A socket wrench set is necessary for loosening and tightening bolts. These bolts secure the stereo unit and other components in place. Make sure you have the right sizes for your car model.
Supplies Needed
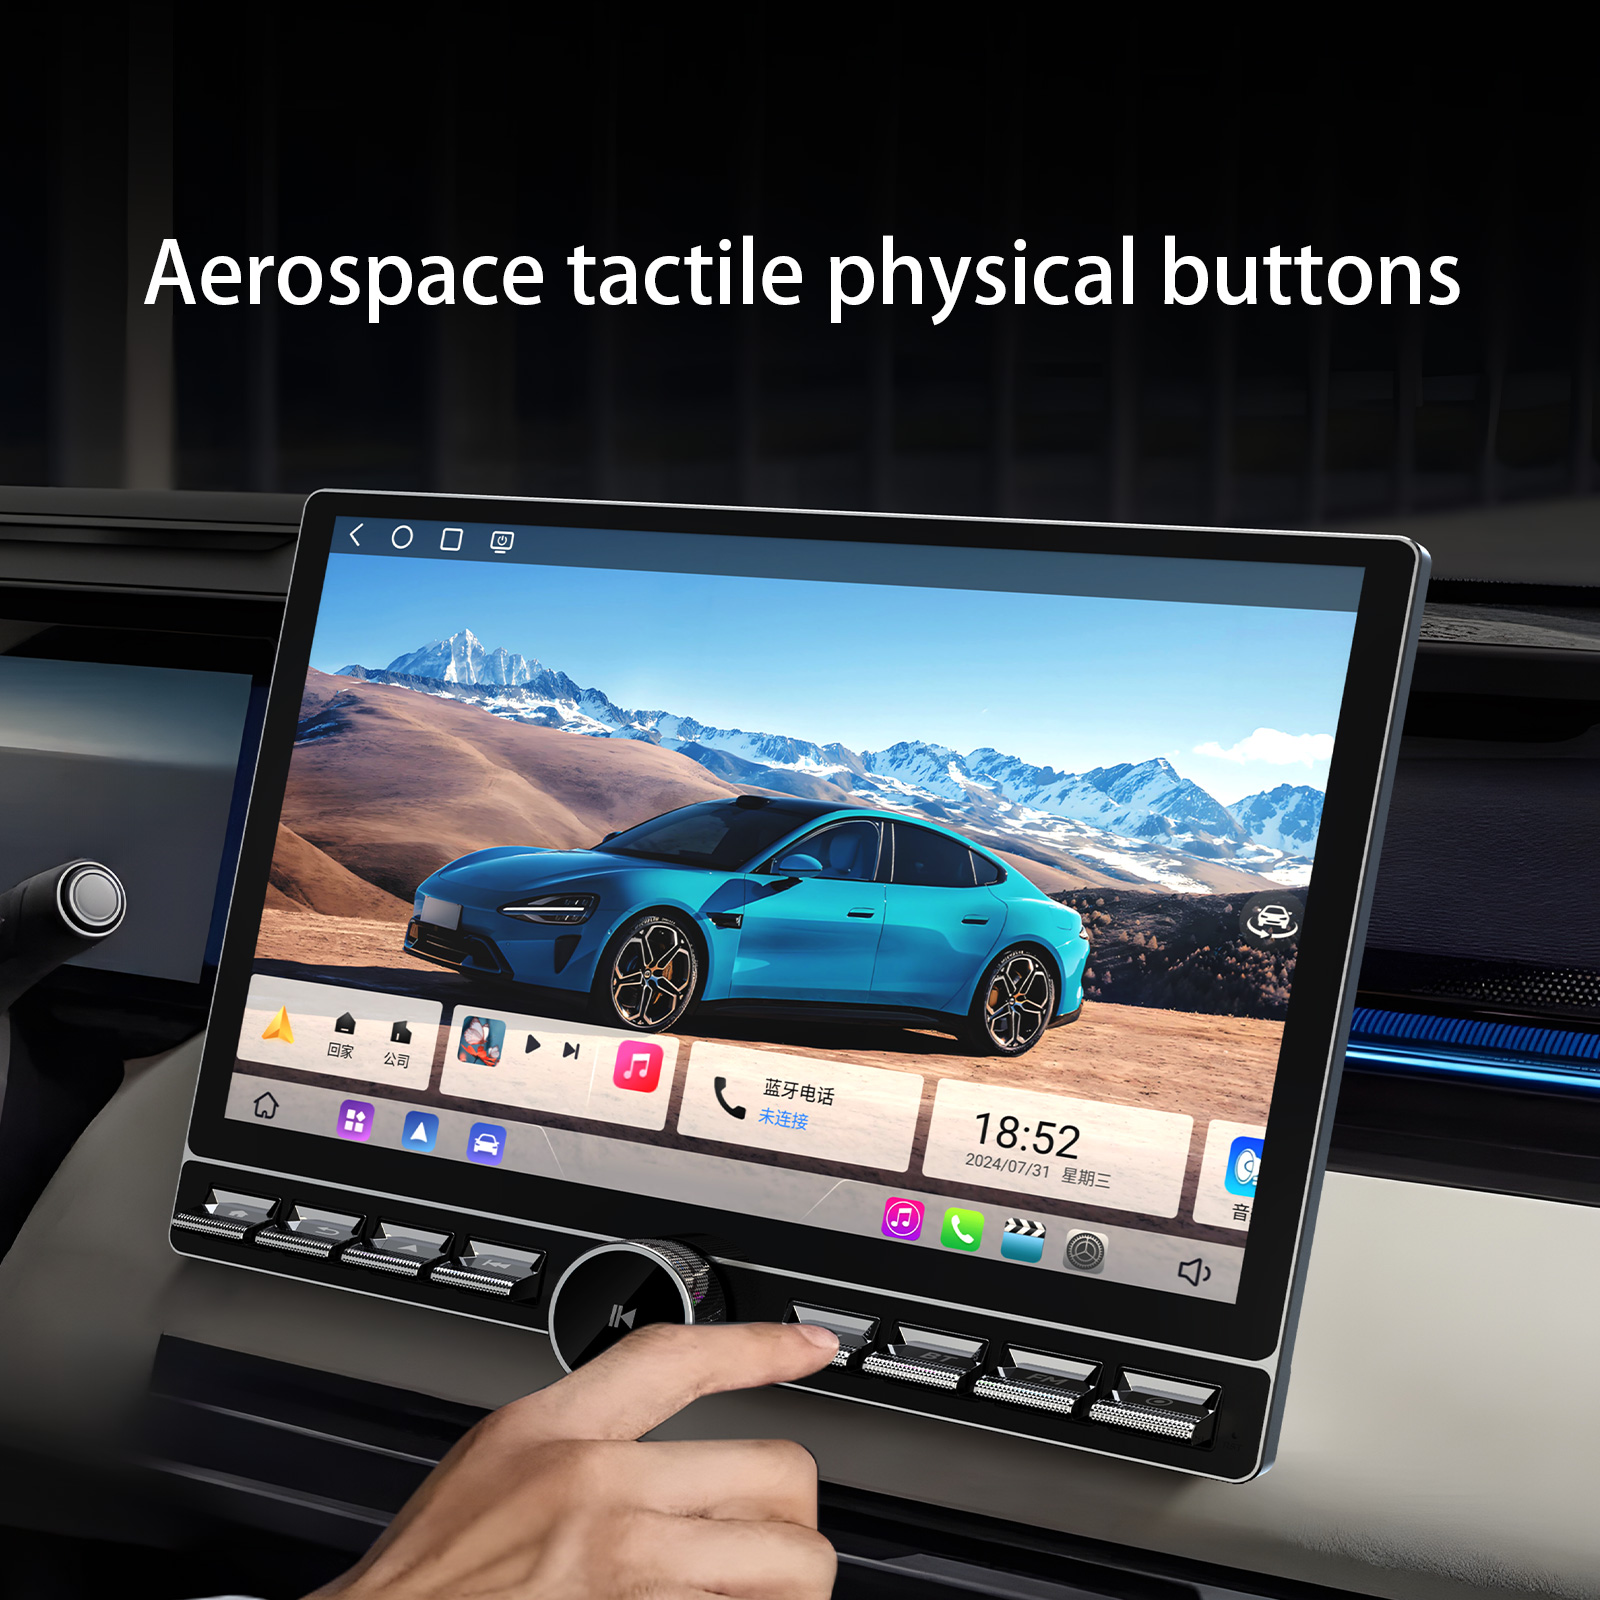
Double Din MP5-II Player
The Double Din MP5-II Player is the star of this upgrade. This player offers features like Bluetooth connectivity, a touchscreen interface, and support for various media formats. Ensure you have the correct model for your car.
Wiring Harness Adapter
A wiring harness adapter connects your new player to your car's existing wiring. This adapter makes the installation easier and prevents any electrical mishaps. Check compatibility with your car model before purchasing.
Dash Kit
A dash kit helps fit the new player into your car's dashboard seamlessly. This kit provides a professional finish and ensures the player stays secure. Look for a kit designed specifically for your car model.
Electrical Tape
Electrical tape is handy for securing wire connections. This tape prevents wires from coming loose and protects them from moisture and other elements. Keep some on hand for a tidy installation.
With these tools and supplies, you're all set to start the installation process. Having everything prepared will save you time and frustration. Get ready to transform your car's audio experience!
Prepare Your Vehicle
Disconnect the Battery
Safety Precautions
Safety comes first when working with your car's electrical system. Disconnecting the battery prevents electrical shocks and short circuits. Always wear safety gloves to protect your hands. Ensure that the car is parked on a flat surface. Engage the parking brake to keep the vehicle stable.
Steps to Disconnect
Locate the car battery under the hood. Use a wrench to loosen the nut on the negative terminal. Remove the negative cable from the battery. Repeat the process for the positive terminal. Place both cables away from the battery to avoid accidental reconnection.
Remove the Existing Stereo
Detach the Trim
The trim around the stereo needs careful removal. Use a plastic trim removal tool to avoid scratches. Start at one corner and gently pry the trim away. Work around the edges until the trim comes off completely. Set the trim aside in a safe place.
Unscrew the Stereo Unit
Locate the screws holding the stereo in place. Use a screwdriver to remove these screws. Pull the stereo unit out of the dashboard slowly. Disconnect the wiring harness and antenna cable from the back. Keep the screws in a small container to prevent loss.
Install the Double Din MP5-II PlayeConnect the Wiring Harness
Match the Wires
Connecting the wiring harness is a crucial step in the installation process. Each wire has a specific function and must connect to the corresponding wire in your car's system. Look for color-coded wires on both the harness and the car's wiring. Match each wire by color to ensure proper connections. The Double DIN Stereo usually includes a wiring diagram. This diagram helps you identify which wires to connect.
Secure the Connections
Once you match the wires, securing the connections becomes essential. Use crimp connectors or soldering to join the wires firmly. Electrical tape can provide extra security and insulation. Wrap the tape around each connection to prevent them from coming loose. This step ensures a stable and reliable connection for your new player.
Mount the Player
Fit the Dash Kit
The dash kit plays a vital role in fitting the Double Din MP5-II Player into your car's dashboard. The kit provides a frame that holds the player securely. Align the dash kit with the opening in the dashboard. Slide the kit into place until it fits snugly. Make sure the kit is compatible with your car model for a perfect fit.
Secure the Player in Place
With the dash kit in position, it's time to secure the player. Slide the Double Din MP5-II Player into the dash kit. Use the screws provided with the kit to fasten the player. Tighten the screws to ensure the player doesn't move during driving. A properly secured player enhances both safety and functionality.
Completing these steps will bring you closer to enjoying your new audio system. The Double Din MP5-II Player offers a modern touch to your car's interior. With features like Bluetooth and touchscreen controls, your driving experience will reach a new level of enjoyment.
Test the Installation
Reconnect the Battery
Steps to Reconnect
Time to bring your car back to life. First, grab a wrench and head to the battery. Start with the positive terminal. Attach the positive cable and tighten the nut securely. Move on to the negative terminal. Connect the negative cable and ensure it's snug. Double-check both connections for stability. A firm connection prevents electrical issues down the road.
Power On the Player
Initial Setup
Now for the exciting part—powering on your new player. Turn the ignition key to the accessory position. Watch the screen light up with anticipation. Follow the on-screen prompts to set up language and time. Adjust the settings to match your preferences. The setup process is quick and straightforward.
Check Functionality
Let's make sure everything works perfectly. Test the audio by playing a favorite song. Listen for clear sound and adjust the volume. Try connecting your phone via Bluetooth. Make a call or stream music to test connectivity. Explore the touchscreen controls for responsiveness. Ensure each feature operates smoothly. A thorough check guarantees a flawless experience on the road.
Final Adjustments and Troubleshooting
Adjust Settings
Audio Settings
Time to fine-tune the audio settings. Start by accessing the audio menu on the player. Adjust the bass, treble, and balance to your liking. Experiment with different presets for various music genres. Ensure the sound quality matches your expectations. A well-adjusted audio setting enhances the listening experience.
Display Settings
Next, focus on the display settings. Navigate to the display menu on the player. Adjust the brightness and contrast for optimal visibility. Choose a wallpaper or theme that suits your style. Ensure the screen is easy to read during both day and night. A clear display improves interaction with the player.
Troubleshoot Common Issues
No Sound
Encountering no sound can be frustrating. First, check the volume level on the player. Ensure the mute function is not activated. Verify the wiring connections behind the player. Loose wires can disrupt the audio output. Test different audio sources like radio or Bluetooth. Identifying the source of the issue helps in resolving it quickly.
Display Problems
Display problems can hinder usability. Start by checking the screen for any visible damage. Ensure the player is receiving power properly. Inspect the wiring connections related to the display. Adjust the brightness settings if the screen appears dim. A thorough inspection helps in diagnosing the problem accurately.
Refer to the Double Din Car HD MP5-II Player Manual
Understanding the Manual
The double din car hd mp5-ii player manual is your best friend during installation. The manual provides detailed instructions and insights. You need to dive into the key sections for a smooth setup.
Key Sections to Review
Start with the wiring diagram. This section shows how to connect wires correctly. Look for color codes and match them with your car's wiring. Next, explore the installation guide. This part explains how to fit the player into the dash kit. Follow each step to avoid mistakes.
Using the Manual for Troubleshooting
The troubleshooting section is a lifesaver. Common issues like no sound or display problems often occur. The manual offers solutions for these hiccups. Check the connections and settings as advised. The Double DIN Stereo manual also covers advanced features. Learn about Bluetooth pairing and touchscreen controls. Familiarize yourself with these to maximize your player’s potential.You’ve just completed the installation of your Double Din MP5-II Player. The process involved gathering tools, preparing your vehicle, and securing the player. This upgrade brings numerous benefits. The player offers Bluetooth connectivity and touchscreen controls. These features enhance your driving experience. Enjoy superior sound quality and modern functionality. Dive into your favorite tunes or podcasts with ease. Embrace the new audio experience on every drive.
See Also
Installing and Programming LCD Smart Car Key for Key Glock Vehicles by iSun
Replacing Your Car Key with iSun's LCD Smart Key

iSun Digitech Limited
Contact : Coco Huang
E-mail: sales@iasun.cn