How to Sync Your Tesla car USB Hub with Dual Screens

Integrating the Tesla USB Hub Dual-Screen Sync Feature into your driving experience significantly enhances your journey. With the Tesla USB drive Model Y, you can enjoy seamless media playback and efficient data management, making it an essential accessory for tech-savvy drivers. Picture accessing all your favorite media files effortlessly on both screens. This setup turns your Tesla into a multimedia powerhouse, allowing you to enjoy movies, music, and more while on the road. The dual-screen sync feature elevates your Tesla's functionality to unprecedented levels. Prepare for a smarter, more connected drive.
Necessary Equipment
USB Hub
Features to look for in a USB hub
Choosing the right USB hub for your Tesla can make all the difference. You want a hub that offers multiple ports. This allows you to connect various devices simultaneously. Look for high-speed data transfer capabilities. This ensures smooth media playback and quick file transfers. A compact design helps maintain the sleek interior of your Tesla. The hub should fit seamlessly into the center console. Durability is another key feature. A sturdy build ensures longevity and reliability.
Recommended models
Several USB hubs stand out for Tesla owners. The Terus USB Hub provides four additional ports. This hub blends well with the Tesla's interior. The Anker 4-port USB 3.0 Hub offers excellent performance. Many Tesla enthusiasts recommend this model. The Glove Box USB Hub is perfect for those needing extra connectivity. It expands the functionality of the glove box USB port. Each of these models enhances your Tesla experience.
Compatible Flash Drives
Storage capacity considerations
When selecting a flash drive, consider storage needs. Large capacity drives are ideal for media files. Think about how much music or video content you plan to store. A drive with at least 64GB is a good starting point. Larger capacities offer more flexibility. Keep in mind the file system requirements for Tesla. Proper formatting ensures compatibility and performance.
Recommended brands
Some brands excel in providing reliable flash drives. SanDisk offers a range of high-capacity options. These drives are known for speed and durability. Samsung also provides excellent choices. Their drives combine performance with reliability. Kingston is another trusted name. Kingston drives offer great value and consistent performance. Choosing from these brands ensures a hassle-free experience.
Preparation Steps
Formatting the USB Stick
File system requirements
Formatting the USB stick correctly is crucial for syncing with your Tesla. The Tesla Model Y requires a specific file system for optimal performance. FAT32 or exFAT are the preferred formats. These formats ensure compatibility with Tesla's media player and data management systems. Choosing the right file system helps avoid playback issues and data errors.
Step-by-step formatting guide
Formatting a USB stick might sound tricky, but it's pretty straightforward. Follow these steps to get it done:
Plug the USB stick into your computer.
Open the file explorer on your computer.
Right-click on the USB drive icon.
Select the "Format" option from the dropdown menu.
Choose
FAT32orexFATas the file system.Click "Start" to begin the formatting process.
Wait for the process to complete, then safely eject the USB stick.
These steps will prepare your USB stick for use in your Tesla. Proper formatting ensures smooth operation and reliable data storage.
Ensuring Correct Folder Structure
Required folders for media and data
Creating the right folder structure is essential for Tesla's media and data functions. Your USB stick should have specific folders for different types of data. Create a folder named TeslaCam for storing dashcam and Sentry Mode footage. For music and other media files, create a separate folder named Music. This organization helps Tesla recognize and access your files efficiently.
Common mistakes to avoid
Avoiding common mistakes can save you time and frustration. Ensure that folder names are spelled correctly. Incorrect spelling can lead to unrecognized files. Don't forget to format the USB stick before creating folders. An unformatted USB stick may not work properly with Tesla's system. Avoid using special characters in folder names. Special characters can cause compatibility issues. Following these tips will help you maintain a smooth and hassle-free experience with your Tesla USB hub.
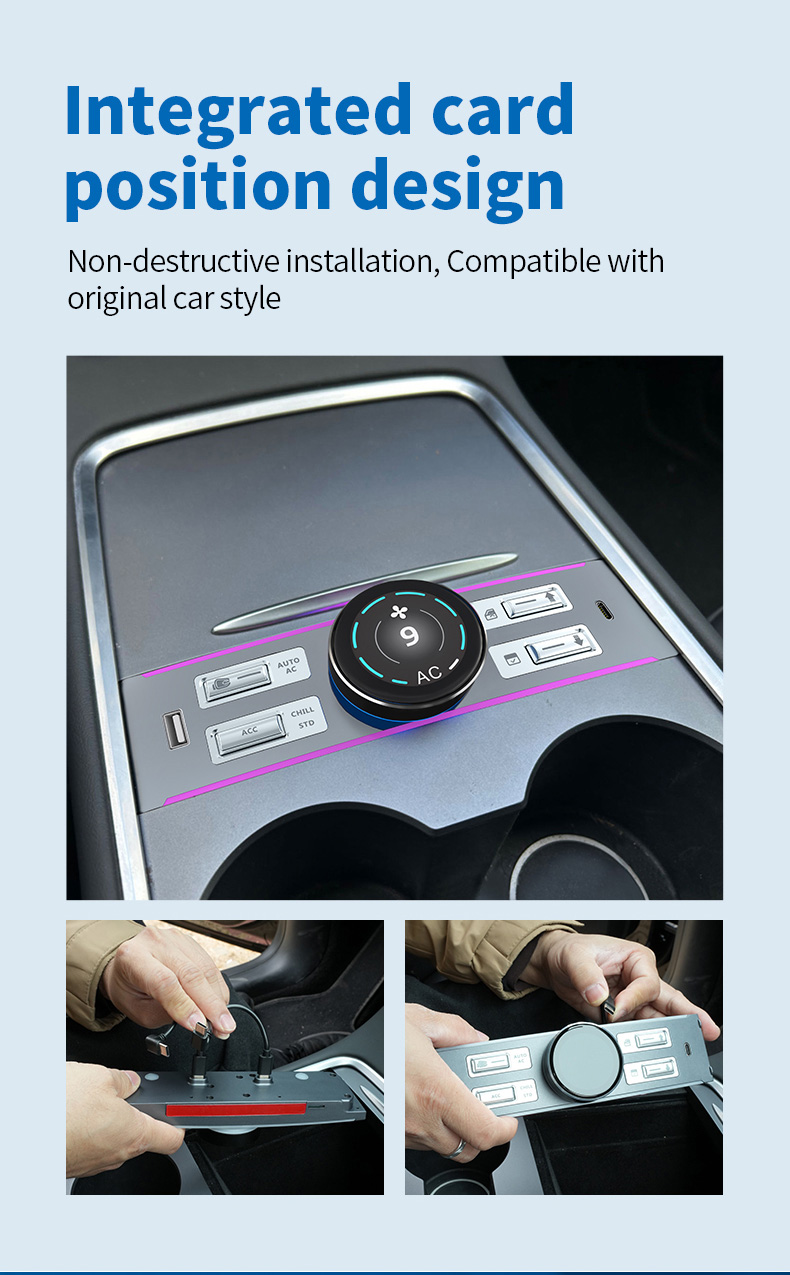
Connecting the USB Hub to Tesla Model Y
Physical Connection Process
Locating the USB ports
Finding the USB ports in your Tesla Model Y is a breeze. The ports are typically located in the center console. Open the console, and you'll spot them right away. The Tesla USB Hub Dual-Screen Sync Feature requires these ports for connection. Make sure you have easy access to them. If you're using a USB hub like the Jeda or Anker, ensure the hub fits snugly into the space.
Proper connection techniques
Connecting the USB hub correctly ensures smooth operation. Insert the hub into the USB ports gently. Avoid forcing the connection to prevent damage. Once connected, check that the hub sits securely in place. The Tesla USB Hub Dual-Screen Sync Feature should activate automatically. If you notice any loose connections, adjust the hub until it feels stable. A proper connection guarantees optimal performance.
Device Recognition and Charging Issues
Troubleshooting unrecognized devices
Sometimes, devices may not get recognized by the Tesla USB drive Model Y. Start by checking the connection. Ensure the USB hub is firmly plugged into the ports. If the issue persists, try unplugging and replugging the device. Restarting the vehicle can also help reset the system. The Tesla USB Hub Dual-Screen Sync Feature should recognize devices once the connection stabilizes.
Ensuring proper charging functionality
Charging issues can occur with multiple devices connected. Check if the devices are drawing power from the hub. If not, try rearranging the devices. Prioritize essential devices for charging. The Tesla USB Hub Dual-Screen Sync Feature supports multiple connections but may limit charging capacity. Ensure the hub's power output matches your devices' needs. This step ensures all devices charge efficiently.
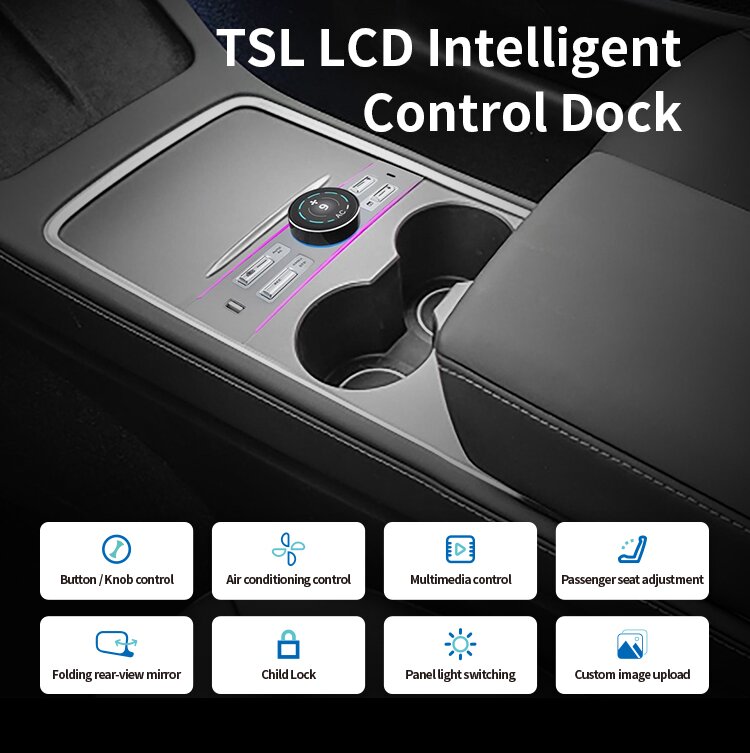
Benefits of Using a USB Hub
Enhanced Media Playback
Supported media formats
A USB hub in your Tesla opens up a world of media possibilities. You can enjoy a variety of media formats, from MP3s to high-definition videos. The Tesla USB Hub Dual-Screen Sync Feature ensures seamless playback on both screens. This feature supports formats like MP4, AVI, and WAV. You can easily access your favorite playlists or movies while cruising down the highway. A well-chosen USB hub enhances the overall media experience in your Tesla.
Improving audio and video quality
The right USB hub can significantly boost audio and video quality. High-speed data transfer ensures smooth playback without interruptions. You can experience crystal clear sound and vibrant visuals. The Tesla USB drive Model Y allows you to enjoy high-definition content. This setup transforms your car into a mobile entertainment center. You can immerse yourself in superior audio and video quality during every drive.
Device Connectivity
Connecting multiple devices
A USB hub expands your Tesla's connectivity options. You can connect multiple devices simultaneously. The glove box USB hub is a valuable accessory for Tesla owners. It provides additional USB ports for charging and connecting devices. You can keep your smartphone, tablet, and other gadgets powered up. This setup ensures you stay connected on the go. The convenience of multiple connections enhances your driving experience.
Managing device priorities
Managing device priorities becomes easy with a USB hub. You can decide which devices need charging first. Essential gadgets like smartphones can take priority. The Tesla USB Hub Dual-Screen Sync Feature supports efficient power distribution. You can ensure all devices receive adequate power. This setup prevents any device from draining too quickly. A well-organized system keeps your devices ready for use at all times.
Troubleshooting and Software Updates
Common Troubleshooting Tips
Resolving connectivity issues
Experiencing connectivity issues with your Tesla USB hub can be frustrating. First, check the physical connection of the USB hub. Ensure that the hub is securely plugged into the USB ports in the center console. Sometimes, a loose connection can cause devices to go unrecognized. If the problem persists, try unplugging and replugging the hub. Restarting your Tesla might also help reset the system and resolve any lingering issues.
Addressing software glitches
Software glitches can occasionally disrupt the functionality of your USB hub. Keep an eye out for any unusual behavior, like media files not playing correctly or devices not charging. If you encounter such problems, a simple restart of your Tesla can often fix the issue. Make sure your USB hub and connected devices are compatible with Tesla's system. In some cases, updating the software on your devices might resolve compatibility issues.
Impact of Tesla Software Updates
Potential changes to USB hub functionality
Tesla frequently releases software updates that can impact your USB hub's functionality. These updates may introduce new features or alter existing ones. For instance, an update might enhance the dual-screen sync feature or improve media playback capabilities. Stay informed about these updates, as they can significantly affect how your USB hub operates.
Keeping your system updated
Keeping your Tesla's software up-to-date is crucial for optimal performance. Regular updates ensure that your vehicle benefits from the latest improvements and bug fixes. To check for updates, navigate to the software section in your Tesla's settings menu. If an update is available, follow the on-screen instructions to install it. Staying current with updates helps maintain a seamless experience with your USB hub and other connected devices.
Syncing your Tesla USB hub with dual screens transforms your driving experience. You can enjoy seamless media playback and efficient data management. The enhanced features offer a world of connectivity and entertainment. You can explore these features to maximize your Tesla's potential.
Final Tips:
Regularly update your Tesla's software for optimal performance.
Choose high-quality USB hubs and flash drives for reliability.
Organize your media files properly for easy access.
Your Tesla becomes a multimedia powerhouse with the right setup. Enjoy the journey!
See Also
Setting Up Hyundai Digital Key on Your iPhone
Discover Secret Functions of iSun's Cadillac LCD Smart Key
Maintaining Your iSun LCD Smart Car Key: Manufacturer Tips

iSun Digitech Limited
Contact : Coco Huang
E-mail: sales@iasun.cn